- How do you show the image of a checkout page?
- How do I display variation images in WooCommerce?
- How do I customize my checkout page in WooCommerce?
- How do I get the thumbnail image in WooCommerce?
- How do I display WooCommerce variations with color size buttons?
- How do I add variation swatches to WooCommerce?
- How do I customize my checkout page?
- How do I customize my checkout page in Shopify?
- How do I create a custom field in checkout?
- What is the best image size for WooCommerce products?
- How do I change the image of a product in WooCommerce?
- How do you fix a blurry thumbnail?
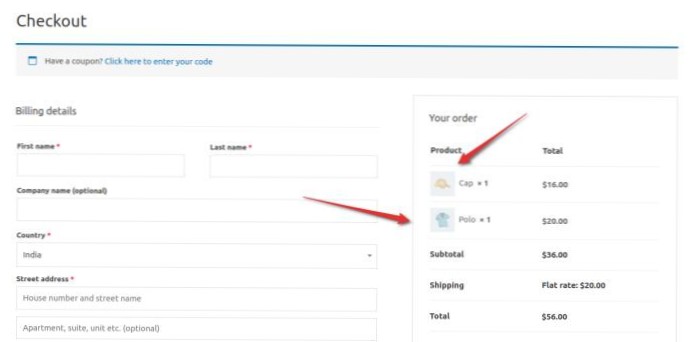
How do you show the image of a checkout page?
From the Dashboard menu, click on Appearance Menu > Theme Editor Menu. When the Theme Editor page is opened, look for the theme functions file where we will add the function that will Show Product Image at Checkout Page.
How do I display variation images in WooCommerce?
Setup and Configuration
- Go to: WooCommerce > Products.
- Select one of your Variable products.
- Select the Variations tab in the Product Details box.
- Find the Add Additional Images link and click. This link allows you to add any number of additional images for each variation.
How do I customize my checkout page in WooCommerce?
Setup and Configuration
- Go to: WooCommerce > Checkout Fields.
- There are three sets of Fields you can edit:
- Select the Add Field button.
- Enter your text and preferences.
- Save Changes.
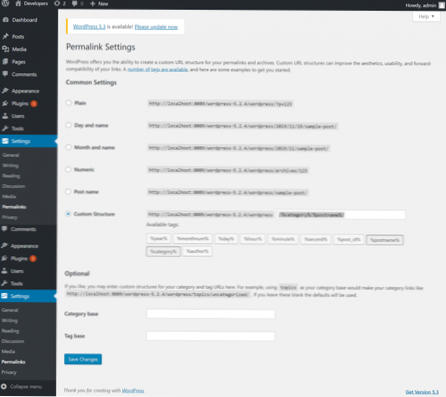
How do I get the thumbnail image in WooCommerce?
In WooCommerce version 3.2x and below, Product Image settings can be found at WooCommerce > Settings > Products > Display > Product Images. Note that the first number is width and the second height.
How do I display WooCommerce variations with color size buttons?
a) Edit Existing Attributes e.g. “Color”
The attribute edit page will now have a new select field called “Type”. You can now pick “Color” from the drop-down to indicate you want this attribute to show as a color-picker.
How do I add variation swatches to WooCommerce?
First, download WooCommerce Variation Swatches plugin, you can also install it via your site backend as well. Head to your site dashboard and navigate to Plugins >> Add New. Search for WooCommerce Variation Swatches in the search field. Install and Activate WooCommerce Variation Swatches Plugin by Emran Ahmed.
How do I customize my checkout page?
Why should you customize the checkout page in WooCommerce?
- Create a one-page checkout.
- Change the checkout style and design with CSS.
- Add, remove, or rearrange checkout fields.
- Include content.
- Make a field required or optional.
- Add conditional fields and create conditional logic.
How do I customize my checkout page in Shopify?
From the Shopify app, go to Store > Settings. Under Store settings, tap Checkout.
...
Under Store settings, tap Checkout.
- In the Style section, click Customize checkout to open the theme editor.
- In the BANNER section, click Upload image, or select an image that you have already uploaded to your library.
- Click Save.
How do I create a custom field in checkout?
To add custom fields to WooCommerce checkout, select the field type in Add New Field section, enter a label name and click on Add Field.
- And it's done! ...
- Here you can enable or disable a field (even the WooCommerce default ones), or set it as required. ...
- In the Appearance tab, you can set Placeholder and CSS Class.
What is the best image size for WooCommerce products?
What size should product images be? The minimum resolution you should be using for your WooCommerce product images is 800px x 800px. We recommend you aim higher than that though because the higher quality your images are the better they will be perceived.
How do I change the image of a product in WooCommerce?
Follow these steps to change shop, catalog or product category image size:
- Go to Appearance > Customize.
- Then go to WooCommerce > Product Images.
- Write your desired width in “Thumbnail width” field.
- You can set the height of the images in “Thumbnail Cropping”
- Click on “Publish”
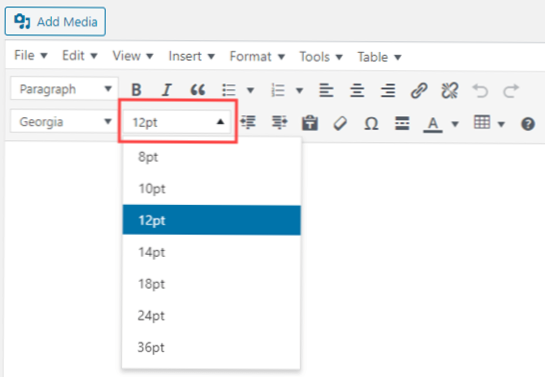
How do you fix a blurry thumbnail?
The best and easiest way to regenerate image thumbnails is to use the Regenerate Thumbnails plugin. Simply install and activate the plugin and from there, go to “Tools” and “Regen. Thumbnails”. Just click on the button “Regenerate All Thumbnails” and the plugin will fix the blurry images like magic.
![How updraft plus executes the configured backup schedule? [closed]](https://usbforwindows.com/storage/img/images_1/how_updraft_plus_executes_the_configured_backup_schedule_closed.png)