- How do I add a custom field in WordPress registration form?
- How do you add advanced custom fields ACF to frontend form?
- How do I display ACF custom fields in frontend WordPress?
- How do I add a custom field to a WordPress profile?
- How do I change the registration form in WordPress?
- What ACF extended?
- How do I add a form to ACF?
- How do I create a custom form in Elementor?
- How do I display custom fields?
- How do I display ACF fields?
- How do I use advanced custom fields?
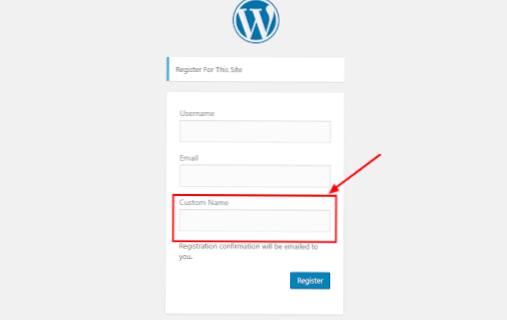
How do I add a custom field in WordPress registration form?
So to begin, you'll need to add custom profile fields to your WordPress website. To do that, go to Custom Fields » Add New. Then give your field group a name like “User Profile.” After that, click Add New to add a field to that group and enter the name and label details.
How do you add advanced custom fields ACF to frontend form?
Installation
- Make sure both Advanced Custom Fields and ACF Frontend are installed and activated.
- Upload the plugin files to the /wp-content/plugins/acf-frontend-form-elements directory, or install the plugin through the WordPress plugins screen directly.
- Activate the plugin through the 'Plugins' screen in WordPress.
How do I display ACF custom fields in frontend WordPress?
How to display custom field information on the frontend of your site.
- Create a New Field Group. Once you've installed and activated the free version of Advanced Custom Fields from WordPress.org, go to Custom Fields > Add New to create your first Field Group. ...
- Add Custom Fields. ...
- Configure Settings and Publish.
How do I add a custom field to a WordPress profile?
Now that your custom fields are set up, you can create a user registration form if you don't already have one. To do this, navigate to WPForms » Add New. Then, select User Registration Form. You can add new fields from the left panel and customize the order of fields using our drag and drop feature.
How do I change the registration form in WordPress?
There is also an option to edit the registration form from Global Settings. When you land on the Global Settings page, select the first menu, General Settings. You will find here, that there are several fields to edit the default WordPress registration form. First, select the Form Style from the drop-down.
What ACF extended?
ACF Extended adds a new layer of compatibility for Polylang. ACF Options Pages and all ACF Extended Modules (Dynamic Post Type, Taxonomy, Options Pages, Block Type) are compatible. ACF Extended adds a new layer of compatibility for WPML.
How do I add a form to ACF?
Create a front end form
- Overview. This article will cover how to create a form on the front end of your website to add or edit content. ...
- Example. This example shows how to add a front end form to a single post page. ...
- Settings. The acf_form() function accepts an array of settings to customize the form element. ...
- Related. Functions: acf_form()
How do I create a custom form in Elementor?
Simply search for the plugin name and install it from there. Once the plugin is installed and activated, you need to go build a form so that you can place it on an Elementor page that you have ready. To build your first form, click on WPForms > Add New. You will see this on the left side menu of your admin area.
How do I display custom fields?
The default way to show custom fields in WordPress would be to:
- Open the single. php file or page. ...
- Find the_content function so you can list your custom field data after the actual content of the post or page.
- Use the get_post_meta function to fetch custom field values using their meta key then list them using PHP echo.
How do I display ACF fields?
To retrieve a field value as a variable, use the get_field() function. This is the most versatile function which will always return a value for any type of field. To display a field, use the the_field() in a similar fashion.
How do I use advanced custom fields?
Advanced Custom Fields plugin is installed like any other plugin. Go to Plugins > Add New and search for Advanced Custom Fields, then press enter. The plugin should show up on first place and you can get it onto your site via Install Now. When the installation is done, don't forget to activate.
![Is it good practice to use REST API in wp-admin plugin page? [closed]](https://usbforwindows.com/storage/img/images_1/is_it_good_practice_to_use_rest_api_in_wpadmin_plugin_page_closed.png)