- How do I change a checkout field in WooCommerce?
- How do I customize my WordPress checkout page?
- How do I add a custom field in WooCommerce checkout?
- How do I change capital letters in WordPress?
- How do I customize my checkout page?
- How do I disable checkout fields in WooCommerce?
- How do I add a custom field in WooCommerce checkout without plugin?
- How do I customize WooCommerce?
How do I change a checkout field in WooCommerce?
Setup and Configuration
- Go to: WooCommerce > Checkout Fields.
- There are three sets of Fields you can edit:
- Disabled fields.
- Select the Add Field button.
- Enter your text and preferences.
- Save Changes.
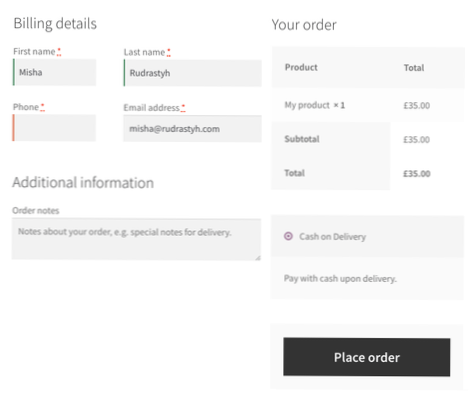
How do I customize my WordPress checkout page?
Go to Settings and enable Before Customer Details custom section. Then, go to Before Customer Details tab and add a field. Click Save Changes and you're ready! Now you have a message on the WooCommerce checkout page.
How do I add a custom field in WooCommerce checkout?
To add custom fields to WooCommerce checkout, select the field type in Add New Field section, enter a label name and click on Add Field.
- And it's done! ...
- Here you can enable or disable a field (even the WooCommerce default ones), or set it as required. ...
- In the Appearance tab, you can set Placeholder and CSS Class.
How do I change capital letters in WordPress?
Click the Visual Editor button inside your post/page for the desired effect:
- UC – Changes selected text to all Uppercase.
- lc – Changes selected text to all lowercase.
- Sc – Changes selected text to all Sentence case.
- Tc – Changes selected text to all Title case.
How do I customize my checkout page?
Why should you customize the checkout page in WooCommerce?
- Create a one-page checkout.
- Change the checkout style and design with CSS.
- Add, remove, or rearrange checkout fields.
- Include content.
- Make a field required or optional.
- Add conditional fields and create conditional logic.
How do I disable checkout fields in WooCommerce?
Go to the WooCommerce tab in your WordPress dashboard. Click on Checkout and then on the Billing tab. You'll see a list of all the fields you can hide so just activate the disable option on the field you want to remove. After that, you can go to the Shipping and Additional tabs and disable the fields you want to delete ...
How do I add a custom field in WooCommerce checkout without plugin?
How to Add Custom Fields to WooCommerce Checkout Page
- Step 1: Define an Array of Fields on Checkout Page. ...
- Step 2: Add Custom Fields to WooCommerce Checkout Page. ...
- Step 3: Concatenate Fields as per Requirement. ...
- Step 4: Display Custom Fields on Order Page. ...
- Step 5: Display Fields on Account Page.
How do I customize WooCommerce?
How to customize the WooCommerce Single Product Page
- Put your WooCommerce Product information in as normal.
- Publish or save your product as draft.
- Click on 'enable WooBuilder'
- This will enable the new Gutenberg editor for that specific product.
- Design your new Single Product Page using the WooBuilder Blocks.
- Publish.
![How updraft plus executes the configured backup schedule? [closed]](https://usbforwindows.com/storage/img/images_1/how_updraft_plus_executes_the_configured_backup_schedule_closed.png)