- How do I change the default country in WooCommerce checkout?
- How do I customize checkout fields in WooCommerce?
- How do I change the checkout field label in WooCommerce?
- How do you customize a field in checkout?
- How do I change my country in WooCommerce?
- How do I change the default shipping method in WooCommerce?
- How do I add a custom field in WooCommerce checkout without plugin?
- How do I create a custom field in WooCommerce?
- How do I remove a ship to a different address WooCommerce?
- How do I customize my checkout page in Shopify?
- How do I add a custom field to a WooCommerce invoice?
How do I change the default country in WooCommerce checkout?
- Step 1: Log in to WordPress admin dashboard.
- Step 2: Go to Appearance > Theme Editor to open the WordPress Theme Editor.
- Step 3: Open the functions.php file.
- Step 4: Copy the following PHP code snippet. /** * Change the default country on the checkout page. */
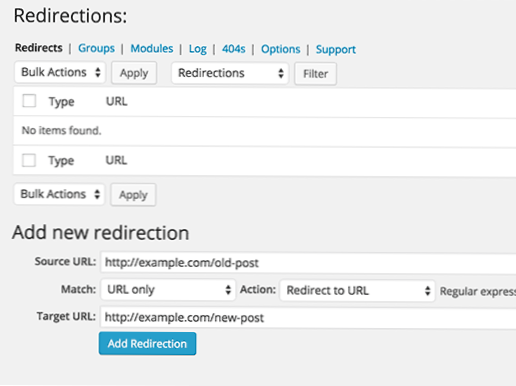
How do I customize checkout fields in WooCommerce?
The Checkout Field Editor extension allows you to add and remove checkout fields, or update the type, label, and placeholder value with a few clicks. You can also mark each checkout field as “required” or “not required.” When adding a new field, you can choose from the following types: Text – standard text input.
How do I change the checkout field label in WooCommerce?
Here's a super quick snippet you can use to rename the WooCommerce checkout “state” field label for both billing & shipping.
...
If you want to rename other fields, just replace 'state' inside the square brackets with:
- 'country'
- 'first_name'
- 'last_name'
- 'company'
- 'address_1'
- 'address_2'
- 'city'
- 'postcode'
How do you customize a field in checkout?
Create conditional fields
In your WordPress dashboard, go to WooCommerce > Checkout > Billing and click Add New Field. Select the type of field you want to create and fill in the label, placeholder/type, and description. This will depend on the type of conditional you're creating.
How do I change my country in WooCommerce?
The preferred way to restrict shipping to just one country is in the WooCommerce Settings under General. And then in the new “Ship to specific countries” field that comes up, select just the country that you want.
How do I change the default shipping method in WooCommerce?
Set the default shipping method in WooCommerce
- Log in to WordPress.
- Click WooCommerce from the left-hand menu.
- Click Settings in the expanded WooCommerce menu.
- Click the Shipping tab.
- Edit the Shipping Zone by clicking the Edit link or the zone name.
- Reorder the Shipping Methods by dragging and dropping the shipping method.
How do I add a custom field in WooCommerce checkout without plugin?
How to Add Custom Fields to WooCommerce Checkout Page
- Step 1: Define an Array of Fields on Checkout Page. ...
- Step 2: Add Custom Fields to WooCommerce Checkout Page. ...
- Step 3: Concatenate Fields as per Requirement. ...
- Step 4: Display Custom Fields on Order Page. ...
- Step 5: Display Fields on Account Page.
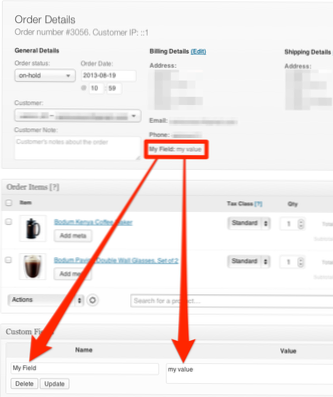
How do I create a custom field in WooCommerce?
It's easy to add a custom field to a product in WooCommerce:
- Go to the product where you'd like to add a custom field.
- In the Product Data section, click the Product Add-Ons.
- Click 'Add Group' then click 'Add Field'
- Choose the type of field you'd like to add from the 'Field Type' option.
How do I remove a ship to a different address WooCommerce?
a) Steps to Remove the Shipping Fields Completely
From the Dashboard menu, click on WooCommerce > Settings. This will open the Settings page. Click on the Shipping tab and then click on the Shipping Options Here you will see Options like Calculations and Shipping destination.
How do I customize my checkout page in Shopify?
From the Shopify app, go to Store > Settings. Under Store settings, tap Checkout.
...
Under Store settings, tap Checkout.
- In the Style section, click Customize checkout to open the theme editor.
- In the BANNER section, click Upload image, or select an image that you have already uploaded to your library.
- Click Save.
How do I add a custom field to a WooCommerce invoice?
Go to WooCommerce > Invoice/ Packing > Invoice from WordPress dashboard.
...
Add product attribute
- From the product attribute, click the Add/Edit Product Attribute button.
- Into the popup that appears, from Add New tab section, key in with field name and the respective meta key.
- Then, click on the Save button.