- How do you set different prices for product variations in WooCommerce?
- How do I add a price range in WooCommerce?
- How do I add a custom field in variation WooCommerce?
- How do I show product variations in WooCommerce?
- How do I add variation sizes in WooCommerce?
- How do I change price in WooCommerce?
- How do I get the lowest price in WooCommerce?
- How do you display the minimum price from multiple variations in WooCommerce?
- How do I get a variable product price in WooCommerce?
- How do I create a custom field in WooCommerce?
- How do I use ACF in WooCommerce?
- How do you use input fields in WooCommerce?
How do you set different prices for product variations in WooCommerce?
How to set up multiple prices per product in WooCommerce
- Step 1: Install WooCommerce Attribute Swatches. ...
- Step 2: Create a variable product. ...
- Step 3: Create product attributes. ...
- Step 4: Add attributes to the product. ...
- Step 5: Add fees to your product attributes.
How do I add a price range in WooCommerce?
Automatic Install From WordPress Dashboard
- Login to your the admin panel.
- Navigate to Plugins -> Add New.
- Search WooCommerce – Show Only Lowest Price in Variable Products.
- Click install and activate respectively.
How do I add a custom field in variation WooCommerce?
To add our variation-specific custom fields, go to the Product Add-Ons tab in the Product data section. Click 'Add Group' then 'Add Field'. In the 'Field Type' setting, choose 'Information'. In the screenshot above, you can see the Product Add-Ons panel.
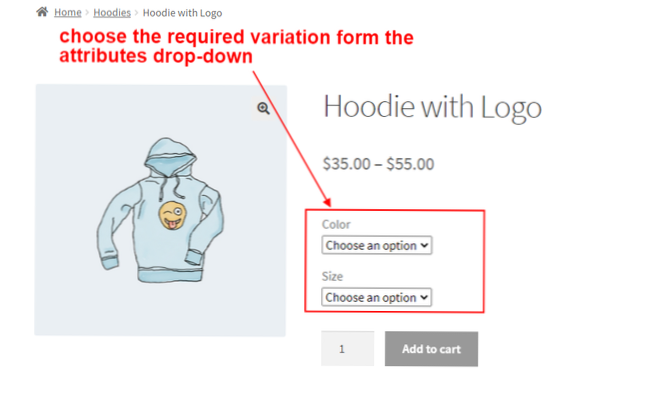
How do I show product variations in WooCommerce?
How to Display Product Variations in WooCommerce (In 4 Steps)
- Step 1: Create a Variable Product. WooCommerce enables you to set up product variations out of the box. ...
- Step 2: Add Product Attributes. Next, click on the Attributes tab. ...
- Step 3: Generate Your Variations. ...
- Step 4: Preview and Publish Your Variable Product.
How do I add variation sizes in WooCommerce?
How To Add Sizes in WooCommerce
- Set up a new attribute: size.
- Add a new variable product that uses the size attribute.
- First, click the 'add variation' button 4 times if you will be using all 4 sizes. Select the name of your sizes from the drop down menus. Then, fill in the product data for each size.
How do I change price in WooCommerce?
How do I change the price of a product in WooCommerce?
- First, log into your WordPress Dashboard.
- Next, from the navigation menu on the left, click the Products link.
- Choose the product you wish to edit.
- In the Product Data panel, select the General tab.
- Update the Regular Price field or Sale Price field with a number.
- That's it! Save your changes.
How do I get the lowest price in WooCommerce?
Installation
- Go to your WP Dashboard > Plugins and search for 'lowest prices in variations' or…
- Download the plugin from WP repository.
- Upload the plugin folder to the '/wp-content/plugins/' directory.
- Activate the plugin through the 'Plugins' menu in WordPress.
How do you display the minimum price from multiple variations in WooCommerce?
To get the minimum variation active price in WooCommerce from a WC_Product_Variable object: $variation_min_price = $product->get_variation_price();
How do I get a variable product price in WooCommerce?
Get WooCommerce product variation price and sale price for your pricing table
- $product_id – The ID of the variable product.
- $variation_id – The ID of the variation that you need to get the price.
How do I create a custom field in WooCommerce?
It's easy to add a custom field to a product in WooCommerce:
- Go to the product where you'd like to add a custom field.
- In the Product Data section, click the Product Add-Ons.
- Click 'Add Group' then click 'Add Field'
- Choose the type of field you'd like to add from the 'Field Type' option.
How do I use ACF in WooCommerce?
Add custom fields to WooCommerce Products using ACF
- Step 1: Install the Advanced Custom Fields (ACF) plugin. Firstly, download and activate the free version of the Advanced Custom Fields plugin. ...
- Step 2: Add a custom field group. ...
- Create a custom field. ...
- Edit a product. ...
- Display our custom field on the product page.
How do you use input fields in WooCommerce?
Installation
- Upload the entire plugin folder to the /wp-content/plugins/ directory.
- Activate the plugin through the “Plugins” menu in WordPress.
- Start by visiting plugin settings at “WooCommerce > Settings > Product Input Fields”.

![Add sync-able bookings calendar to the site [closed]](https://usbforwindows.com/storage/img/images_1/add_syncable_bookings_calendar_to_the_site_closed.png)
