- How do I add a custom field in WordPress registration form?
- How do I add a custom field to a WordPress profile?
- How do I save custom field data in WordPress?
- How do I add a password field to my WordPress registration?
- How do I change the registration form in WordPress?
- How do I get advanced custom field value in WordPress?
- How do I create a user profile in WordPress?
- How do I add a registration form field in WooCommerce?
- How do I save a custom field?
- How do you add a custom post type field?
- How do I use advanced custom fields?
How do I add a custom field in WordPress registration form?
So to begin, you'll need to add custom profile fields to your WordPress website. To do that, go to Custom Fields » Add New. Then give your field group a name like “User Profile.” After that, click Add New to add a field to that group and enter the name and label details.
How do I add a custom field to a WordPress profile?
Now that your custom fields are set up, you can create a user registration form if you don't already have one. To do this, navigate to WPForms » Add New. Then, select User Registration Form. You can add new fields from the left panel and customize the order of fields using our drag and drop feature.
How do I save custom field data in WordPress?
Adding Custom Fields in WordPress
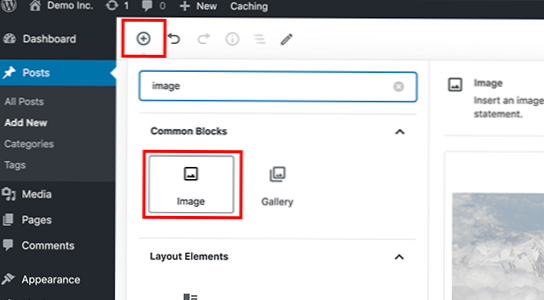
First, you need to edit the post or page where you want to add the custom field and go to the custom fields meta box. Next, you need to provide a name for your custom field and then enter its value. Click on the Add Custom Field button to save it.
How do I add a password field to my WordPress registration?
Installation
- Upload the as-password-field-default-registration folder to /wp-content/plugins/
- Activate the plugin (AS Password Field In WordPress Default Registration Form) through the 'Plugins' menu in WordPress.
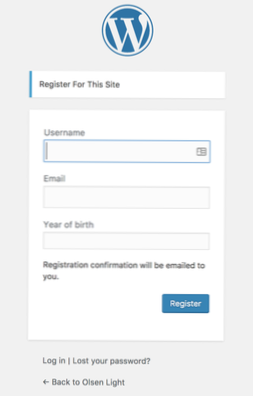
- Check you website's default registration form.
How do I change the registration form in WordPress?
There is also an option to edit the registration form from Global Settings. When you land on the Global Settings page, select the first menu, General Settings. You will find here, that there are several fields to edit the default WordPress registration form. First, select the Form Style from the drop-down.
How do I get advanced custom field value in WordPress?
To retrieve a field value as a variable, use the get_field() function. This is the most versatile function which will always return a value for any type of field. To display a field, use the the_field() in a similar fashion. Here's a basic usage example, and please be sure to view the code example page for more.
How do I create a user profile in WordPress?
Installation
- Upload the profile-builder folder to the '/wp-content/plugins/' directory.
- Activate the plugin through the 'Plugins' menu in WordPress.
- Create a new page and use one of the shortcodes available. Publish the page and you're done!
How do I add a registration form field in WooCommerce?
Custom User Registration Fields for WooCommerce
- Download the . zip file from your WooCommerce account.
- Go to: WordPress Admin > Plugins > Add New and Upload Plugin the file you have downloaded.
- Install Now and Activate.
How do I save a custom field?
Save a file with your custom extension. Open the file in Windows Explorer and it will ask you how to open it. Choose "pick from list", select the program you want, and check "Always use the selected program to open this kind of file". Voila, you can now "run" files with your custom extension.
How do you add a custom post type field?
How to Add Custom Fields to WordPress Custom Post Types
- Install and active Advanced Custom Fields free plugin.
- Click Custom Fields on your WordPress sidebar and add a new field.
- Hit Add Field and complete general settings. ...
- Set Post Type rules in the Location section. ...
- Publish the new custom field.
How do I use advanced custom fields?
Advanced Custom Fields plugin is installed like any other plugin. Go to Plugins > Add New and search for Advanced Custom Fields, then press enter. The plugin should show up on first place and you can get it onto your site via Install Now. When the installation is done, don't forget to activate.